Black Bean Brownies… continued

I’m back!

After a brief (7 month…oops!) hiatus, I have refocused my time back to the blog. Life got busy and creategreatthings suffered. I am here to present you with a video I made that was accepted for publication in an online student health magazine, Student Health 101 @ the University of Guelph. Pretty exciting!

Check it out:

http://www.read101.ca/uoguelph.html

I’m on page 13.

I’ll be back again soon; cauliflower pizza crust is in the oven as I type.

Black Bean Brownie

These are the most surprisingly delicious brownie I have ever eaten. It takes a little convincing, but I was excited to try these Black Bean Brownies. In a world where food intolerances are so prevalent, a gluten-free solution to the everyday brownie is awesome.

My favourite recipes involve very few steps. They are easy for anyone to follow, and done in just a few minutes. For this recipe, all you have to do is add your ingredients to a food processor (I used a MagicBullet attachment) and blend until the batter is almost smooth. You will see some of the bean skins, but that’s okay – you don’t notice any change in the texture once they have baked.

Another exciting thing about these brownies is that they are super moist. They stay that way for a few days, or so I have been told. In my house they only lasted 24 hours. Yum!

What you need:

1 19oz can reduced sodium black beans (well rinsed and drained or dried beans that have been soaked and cooked)
2 eggs
1 egg white
3 tablespoons canola oil
1/4 cup dark cocoa powder
1/2 cup demarera sugar
1 teaspoon baking powder
1 teaspoon vanilla extract
1/2 cup semi-sweet chocolate chips

How to make it:

Preheat the oven to 350°F.
Spray a 12-muffin, muffin tin with Pam or another oil spray.
In a food processor, combine all of the ingredients except the chocolate chips.
Blend until it is a smooth consistency.
Pour the batter into the prepared pan.
Sprinkle the chocolate chips on the top of the brownie batter.

Bake for 22-25 minutes or until a cake tester comes out clean.
Allow them to cool completely in the pan before removing.

Makes 12 individual brownies.

Enjoy!

** deliciously adapted from: Chocolate and Carrots at http://chocolateandcarrots.com/2011/05/black-bean-brownies-gluten-free

Wedding of 12

Recently a friend of mine came to me with a request. Friends of her family were moving and it was becoming quite complicated. The man and woman had been together for nearly 15 years, but never married. When applying for Visas they came to realize that the woman would not be allowed to live in the country without a husband. With the Visa deadline quickly approaching, it was off to City Hall for them. Everything had to be done in a week, so it would be a wedding with no frills. But who wants a wedding without a celebration?

This is where I come in.

We figured they needed something a little more. They booked their favourite restaurant in town and plans we all fitting into place. Because the reception/ dinner was being held in a restaurant, they couldn’t cater out for a cake; per the restaurants group dining rules. We decided that cupcake favors would be the perfect surprise at the end of the night.

For the cupcakes, I used the champagne cupcake recipe I have used in the past. This time I used to a regular champagne instead of Rose and it turned out just as well.

For the cupcakes

2 and 3/4 cups all-purpose flour

3 teaspoons baking powder

1 teaspoon salt

2/3 cup unsalted butter, at room temperature

1 and 1/2 cups white sugar

3/4 cup champagne

6 egg whites

————

Preheat oven to 350 degrees.

Line cupcake pans with paper liners.

In a large bowl, cream together butter and sugar until very light and fluffy.

Sift flour, baking powder, and salt together, and then blend into creamed mixture alternately with champagne.

In another large clean bowl, beat egg whites until stiff peaks form.

Fold 1/3 of the whites into batter to lighten it, then fold in remaining egg whites.

Fill the cupcake liners about 2/3 full.

Bake at 350 degrees for 20 minutes, or until a toothpick inserted into the cake comes out clean.

For the buttercream frosting

3 and 1/4 cups powdered sugar

1 cup unsalted butter, at room temperature

1/2 teaspoon vanilla extract

3 tablespoons champagne, at room temperature

**add a hint of Wilton colouring to make the icing pop

————

With an electric mixer, beat together sugar and butter.

Mix on low until well blended, and then on medium for another two minutes.

Add vanilla and champagne, beating on medium for another minute.

Pipe onto cooled cupcakes. (I used a Wilton 31 tip to pipe the green icing under the flowers)

The flower petals are pretty time-consuming, but very inexpensive. The number of marshmallows you need will vary on how many cupcakes you make and how big your flowers are going to be.

Start by cutting about 2 cups of mini marshmallows in half diagonally
Chose the colours you want your flowers to be and dip the marshmallows in the sprinkles to coat the cut side of the marshmallows.
Start in the centre and place the cut and sprinkle covered marshmallows in circles until they are the size you want them.

I piped a yellow centre in each flower, but that isn’t necessary.
If you do this, leave aside some of your icing from the initial batch and add a small amount of yellow colouring. I used a Wilton 7 tip to pipe the centres of the flowers.

Each cupcake was placed in a take outbox and placed in front of each guest before the meal began

Whole Wheat Challah

May’s Daring Bakers’ Challenge was pretty twisted – Ruth from The Crafts of Mommyhood challenged us to make challah! Using recipes from all over, and tips from “A Taste of Challah,” by Tamar Ansh, she encouraged us to bake beautifully braided breads.

This month I have begun my journey with Daring Bakers. Challah bread is something I have always wanted to try because it looks so beautiful. I have always felt a little trepidation when approaching it, not knowing how well it will turn out. For some extra help when you are using the recipe, look up youtube videos for tips on how to actually braid the bread. Perhaps if/when I make this again, I will make a video to explain it.

The process of making bread really isn’t hard at all. The yeast is the most crucial part – see the picture of the foamy yeast below. As usual, the bread making process itself is lengthy – only because you have to let the dough rise 3 times. I used the whole wheat recipe provided by this month’s challenge host and it worked out perfectly! I hope you have the same luck as I did. When it turns out, you will be so pleased with yourself.

Ruth’s “Go­To” Whole Wheat Challah
(adapted from D’s Whole Wheat Challah)
Servings: 12

Ingredients

2 (.25 oz.) packages (4½ teaspoons) (22½ ml) (15 gm) (½ oz) dry yeast
1 cup (240 ml) warm water (100°F/38°C)
½ cup (120 ml) (100 gm) (3½ oz) brown sugar, firmly packed
½ cup (one stick) (120 ml) (115 gm/4 oz) margarine or unsalted butter – room temperature
2 tsp. (10 ml) (15 gm) (½ oz) salt
3 large eggs
2 cups (480 ml) (280 gm/10 oz) whole wheat flour
2 cups (480 ml) (280 gm/10 oz) all­purpose flour
½ cup (120 ml) (50 gm) (1¾ oz) rolled oats (Old Fashioned work just fine!)
Additional flour for kneading (½ to 1 cup) (120 to 240 ml) (70 to 140 gm) (2½ to 5 oz)
1 egg beaten with 1 tsp. water for glaze

Directions:

1. In the bowl of your stand mixer, dissolve yeast in warm water. Allow to stand about 5
minutes until creamy/foamy.

2. With paddle attachment beat 3 eggs, sugar, margarine (or butter), whole wheat flour, all
purpose flour and oats into the yeast mixture. Or, if mixing by hand (ok, spoon), combine
eggs and margarine/butter with yeast mixture until well mixed. Add flours and oats and mix
until it becomes difficult to mix.
3. Once combined, switch to the dough hook and knead for 5 to 10 minutes until smooth and
elastic, adding flour as/if needed. If kneading by hand, this should take about 10­12 minutes.
4. Form dough into a round, compact ball. Turn in oiled bowl, cover with a kitchen/tea towel.
Let rise in warm area (I put it in the oven with the light on) until doubled, approx. 2 hours.
5. Once dough has doubled, punch down. Recover with towel, allow to rise again for an hour,
but even 30 minutes will be fine if you’re in a hurry.
6. Punch the dough down again, divide in two.

7. Shape each half as desired (3, 4 or 6 strand braid, rolls, etc.). Place shaped loaves onto
parchment covered baking trays. Cover with the towel and allow to rise another hour.
8. Preheat oven to 350 degrees.
9. Brush loaves with egg wash. (I added oats to the top, but only for aesthetic reasons)
10. Bake 30 to 40 min. until the loaf sounds hollow when tapped on the bottom.
11. Transfer loaves to a wire rack to cool before serving.

I just tried the first two pieces with almond butter – delicious!

Rhubarb + Berry Crisp

Rhubarb is a true sign of spring. Last weekend I was at a friend’s house and we took a trip to the backyard garden where she cut fresh rhubarb. I was thinking of all of the options I could use the rhubarb for, but this crisp seemed like the best one.

I have fond memories of cutting rhubarb from the garden and dipping the ends in a little dish of sugar. It cut the tart rhubarb flavour and was simply magical. Being a favourite of mine, I use it a lot when it’s in season. Stewed rhubarb is great, and so is apple sauce with rhubarb added to it. I’ve seen it made into a compote for the top of creme brulee; there are so many dishes to add it to!

Just remember: don’t eat the leaves!

This crisp recipe was something I made up as I found ingredients in my fridge and pantry. It’s for a potluck breakfast tomorrow, so heres hoping it tastes great!

What you need:

5 cups mixed berries (frozen or fresh)
5 cups rhubarb
1/2 lemon, squeezed for juice
1 tbsp vanilla
3 tsp. brown sugar

1 cup flour
1 cup quick or cooking oats
1 1/2 cup brown sugar
2/3 cup unsalted butter
1 tbsp cinnamon

How to make it:

Preheat oven to 375.

Grease 13″x9″x2″ baking pan.

Wash and chop rhubarb, combine with berries. Spread evenly in baking pan.
Sprinkle brown sugar over top of the fruit mixture. Pour lemon juice and vanilla evenly over fruit mixture.

In a medium sized bowl, combine flour, oats, brown sugar, butter and cinnamon. Use a fork, food processor, or your hands, to combine until you reach a desired consistency.

Bake in the oven for 30 minutes, or until the topping is golden brown and the fruit is bubbling.

Enjoy!

Ryan Family Lemon Squares

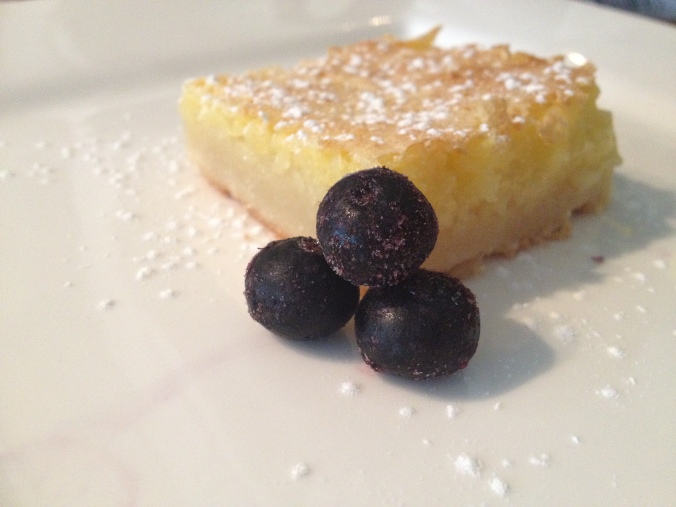
Quick, simple and delicious. These really are the best qualities of a square – and for that matter, any dessert.

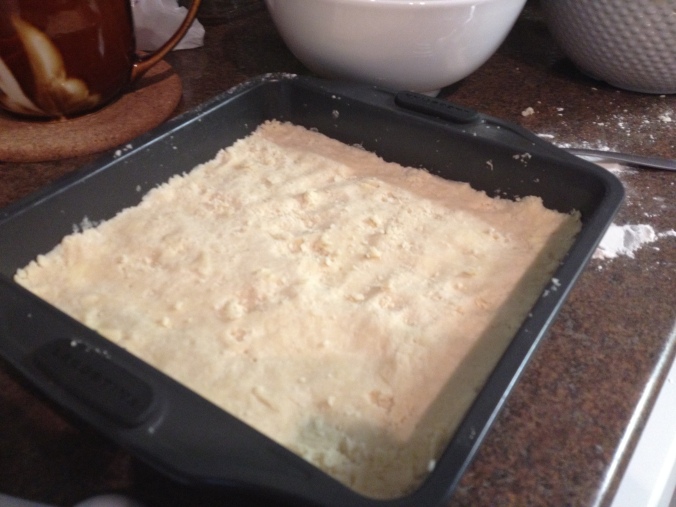
Lemon squares are comprised of two components. The first and bottom layer is shortbread. In my opinion it is equally if not more important than the lemon layer it supports. It should crumble a little, but remain sturdy enough to keep the square together once it is cut. “Buttery” and “smooth” are the first words that come to mind when I think of what I expect of the shortbread layer. Onto the second layer, the lemon layer. Some people think using lemon juice from a container is sufficient, but I have to disagree. Nothing tastes as good as freshly squeezed lemon in a lemon square – or frankly anything with lemon. I also always use lemon rind. When you think about it, it is what gives it the most flavour. Beverages like Lemoncello are fermented with lemon rind, not the juice of the lemon. It only makes sense to add the best ingredients to something so simple as a lemon square.

In my journey of finding the perfect lemon square recipe, I think this is my number 1. I’ve tried a few, friends and family have recommended them to me, but this one always reigns supreme. To its credit, it brings rave reviews. It is nothing I have done out of the ordinary. I have simply followed the recipe from generations before me – adding the lemon rind however, is my own adaptation.

1st layer
1 cup butter softened
2 cups flour
1/2 cup icing sugar

crumble with your hands (or pastry cutter, if you must) until pea size bit form.
spread in 9×13 pan. bake at 325 for 15 min.

2nd layer
2 cups sugar
4 eggs
4 tbsp. flour
1 tsp baking powder
6 tbsp lemon juice

combine all ingredients, pour and spread on 1st layer.
bake at 350 for 25 min.

Cool and sprinkle with icing sugar if desired.

(do this, it makes them absolutely beautiful when cut!)

Double Chocolate {Birthday} Cake

This was a quick, last minute save – how could I not make a Birthday Cake? It almost slipped my mind, but thanks to my trusty iCal reminder, I got on making a cake ASAP. One Problem: No eggs in the fridge!

The solution: an egg-less chocolate cake.

This recipe is super simple and took me 40 minutes from measuring the flour, to taking it out the oven.

What you need:
1 2/3 cups all-purpose flour
1 cup packed brown sugar or 1 cup granulated sugar
1/4 cup cocoa
1 teaspoon baking soda
1/2 teaspoon salt
1 cup water
1/3 cup vegetable oil
1 teaspoon vinegar
1/2 teaspoon vanilla
1/2 cup semi-sweet chocolate chips

Heat oven to 350°.
Mix flour, brown sugar, cocoa, baking soda and salt with fork in ungreased square pan, 8x8x2 inches.

Mix in remaining ingredients except chocolate chips. Sprinkle chocolate chips over batter.

Bake 35 to 40 minutes or until toothpick inserted in center comes out clean.

Sprinkle with powdered sugar if desired.

** I used large letter magnets to create a stencil to make the cake extra-birthday like

Recipe from: http://www.food.com/recipe/double-chocolate-cake-eggless-145125#ixzz1qvwS6rXq

Oatmeal Chocolate Chip Prune Cookies

For someone 20 years old, it may come as a surprise that I am a big prune supporter. They seem to have a bit of a bad rap. I must say however, prunes are like candy! They are absolutely delicious and I simply cannot resist them. I’ve incorporated them into this recipe instead of using raisins or dried cranberries, like you might expect.

Oatmeal anything cookies are my favourite. Again, some may find that weird. “What is exciting about an oatmeal cookie?”, you might ask. Well, to me, just about everything. I love the slight crunch on the outside, and the perfectly soft inside. The cinnamon is wonderful and the add-ins make it perfect.

I’ve done something a little different with these cookies. You can choose to omit it, but I strongly urge you to try it. I’ve added cayenne pepper. Strange addition, you might think. It is truly delicious and the bold flavour makes your taste buds dance. It isn’t something that hits you right away, but wait a second or two and you are in for a treat!

What you need:

3/4 c all purpose flour
1/2 tsp baking soda
1/4 tsp baking powder
1 tsp cinnamon
1/2 tsp cayenne pepper
1 c rolled oats
1/2 c cooking oats
1/2 c unsalted butter
2/3 c brown sugar
1/3 c granulated (regular white) sugar
1 large egg
1/2 tsp vanilla (I am pretty liberal with my vanilla and I never measure it)
1/2 c chocolate chips
3/4 c pitted prunes (coarsely chopped)

Put it all together:

Combine all dry ingredients in a medium mixing bowl and set aside.

In a separate mixing bowl, cream butter until smooth. Gradually add both sugars and continue to combine until the sugar and butter are fluffy and well combined. (I used a kitchenaid mixer and used the paddle attachment. You don’t need use the whisk attachment – in fact it will only cause you problem trying to get all the bits of butter out!)

Add eggs and vanilla extract and continue to mix until well combined.

Add flour mixture and combine gently until mostly incorporated. You should be able to see a few strokes of flour.

Add the chocolate chips and prunes and stir with a wooden spoon.

Place cookie dough in a covered bowl in the refrigerator for 30 minutes to allow the oats to hydrate.

Remove from fridge and portion dough into 1.5 oz or 1 inch balls. Place on two silpat or parchment-covered baking sheets. Flatten into round discs. Makes about 20 cookies.

Bake in the oven for 13 minutes at 350°.

Remove from oven and let cool for a couple of minutes on the baking sheets before moving the cookies to a cooling rack.

Enjoy!

Matcha Green Tea Black Bottom Cups

Described by my roommate as, “the best dessert ever,” Black Bottom Cups are an egg, milk,and solid fat free chocolate cupcake filled with a chocolate chip cream cheese mix. They are absolutely delicious; I fully support what she says.

Being that tomorrow is St. Patrick’s Day tomorrow, I figured it was only appropriate to make such delectable cupcakes. To make it a little more “Irish”, I have added my most exciting new purchase – Matcha Green Tea powder (I realize that only the colour makes it more appropriate as the matcha powder is actually from Japan). Now I know, I am just a sheep. Matcha is big right now. It can been seen left, right, and centre – in lattes, as tea, and as done here, in food! I say embrace it. It is pretty tasty, and I hear it’s not too bad for you either. Great combo.

The recipe is really simple. All that I have done to change it is add the matcha powder. Try mixing it up with other things too, you never know how it will turn out.

Filling:
250g cream cheese at room temperature (this is important otherwise you will be left with big chunks of cream cheese)
1/3 cup white sugar
2 ounces semi sweet chocolate chips
1 egg
1 tsp matcha green tea powder (add more if you like!)

Cupcake:
1 1/2 cups all purpose flour
1 cup firmly packed brown sugar
1/3 cup cocoa
1 tsp baking soda
1/4 tsp salt
1 cup water
1/3 canola or vegetable oil
1 tbsp white or cider vinegar (I used white wine vinegar and it was fine)
1 tsp vanilla

Preheat oven to: 350°F (175°C)

Filling:
1. Beat egg and sugar until well combined, add matcha powder.
2. Add cream cheese and beat until smooth.
3. Add chocolate chips and mix using a spatula or wooden spoon.

Cupcakes:
1. Sift together flour, brown sugar, cocoa, baking soda, and salt.
2. In a seperate bowl mix together water, oil, vinegar, and vanilla.
3. Make a well in the center of the dry ingredients, stirring until almost smooth with some lumps still present.

** You never want to overmix a cake batter. Doing this will over-develop the gluten strands that come from your dry component. Doing this will cause peaks and tunnels in your cupcake and even make it a little tough!

4. Divide the batter among muffin cups; about 1/3 of the way.
5. Drop a spoonful of filling in the center.
6. Bake for 25 minutes. Check around 23 incase your oven is a bit hot.

Exciting news: I made the cake stand too!

Recipe adapted from: Mrs. White

Poached Pear Galette

Pears, wine, pastry. What could be better?

Incase you don’t know, a galette is like a free form pie. It’s much easier than making a pie, and sometimes make me wonder why I would ever actually make a pie. Thinking that however, I am quickly reminded that while my sister loves me, she might love me a little less if I stopped making proper pies all together. Galettes are nice because you can fill them with what ever you like, and leave the edges as cut, or fold them over a small amount of your filling to trap in all of those delicious juices and flavours. I highly recommend exploring the galette world.

Pears are a nice change from apples, and are one of my favourite fruits. There are many different kinds, and with the recipe I went with Bosc pears. They are one of the cheaper kinds of pear and I’m sure that you can find them in almost any grocery store in North America, and beyond.

Moving onto the topic of pastry, don’t fear the pastry! This pastry is pretty forgiving and I quote, “the best pastry you have ever made.” Thanks Mom! Having seen the idea of grating butter in a lot of recipes circulating recently I was excited to try out the technique. I think it’s a brilliant idea, and I’m sure you will to once you give it a shot. It eliminates the fear of doing it wrong with your hands and is so much easier over all.

So here goes – I hope you and your friends enjoy this as much as my family, friends, and I did.

Quick Flaky Pastry

4 oz (110g) unsalted butter (always use unsalted butter when making pastry)
6 oz (175g) all-purpose flour
pinch (1/2 tsp) salt
100 ml ice water
*yields 10 oz pastry dough*

1. Measure 110g of butter and wrap in foil. Place in freezer until you are ready to use it.
2. Sift flour and salt into a large mixing bowl.
3. Remove butter from the freezer and coarsely grate it using a stand up grater.
*The butter will start to soften a bit being at room temperature. When this happens dip the end you are grating in your flour and continue to grate. Repeat this as necessary.
4. Add the grated butter to the flour mixture. Using a palette knife, being to pull together the butter and flour. You want the flour to coat all of the little pieces of butter.
5. Sprinkle 2 tablespoons of ice water over the butter and flour and continue to use the palette knife to pull it all together.
You may now begin to use your hands to bring the dough together. If you find your pastry is a bit dry, add 1 tablespoon of ice water at a time. You don’t want to pastry to be wet, but your bowl should be pretty clean when you are done.
6. Wrap the dough in plastic wrap or a ziploc bag and refrigerate until use.

Poached Pear Galette

3 firm unripe pears (I used Bosc) peeled with the stalk left attached
10 oz pastry dough (you’ve already done this!)
10 fl oz (275ml) red wine
1 oz (25g) caster sugar
1/2 cinnamon stick (or 1 tsp ground cinnamon)
1/2 vanilla bean
1 tsp arrowroot (I used gelatin powder and it was fine)

1. In a medium sauce pan, lay the peeled pears on their side.
2. In a mixing bowl combine red wine and sugar, and pour over the pears. Add the vanilla bean and cinnamon stick, cover and let gently simmer for 45 minutes. Turn half way through poaching to ensure all sides of the pear are evenly coloured.
** In case you hadn’t caught on, your pears will take on the colour from the wine – OSMOSIS!
3. Pre-heat oven to 475°F (220°C)
4. Remove the pastry from the refrigerator and lightly flour your rolling surface. With your rolling utensil of choice, roll the dough to about 1/8 inch (3mm) thick. Cut into six, 4 inch (10 cm) circles and arrange them on a lightly greased or silpat-covered baking sheet.
** If they don’t all fit, put the rest on another baking sheet
5. Remove pears from the wine mixture when ready and stand each pear up on end. Cutting through the stalk, cut the pears in half. Remove the core using a melon-baller.
6. Using a sharp pairing knife, starting from just below the stalk, slice the pear downward on a slight angle so that you can create a fan with the pear slices – while still attached to the stalk.
7. Place each half-pear-fan on a circle of pastry and place in pre-heated oven for 10-12 minutes until pastry is lightly golden brown and puffy.
8. Meanwhile, remove cinnamon stick and vanilla bean and place sauce pan on high for 5 minutes.
9. In a cup mix arrowroot with a little cold water until a smooth paste forms. Add this to the wine mixture and whisk until it resembles the thickness of a syrup. Remove from heat.

Remove the pastries from the baking sheets and individually plate each one. At this point you can choose to serve immediately, thus warm, or let them cool. Drizzle the syrup over each pastry as you wish.

Recipe adapted from: http://www.daliaonline.com